Recording Your First Events
Goal: You understand how onboarding works and have saved your first event.
What Is an Event?
An event is the smallest unit in the app:
Event = Timestamp + Parameter + Value

Examples:
  12/03/2026 14:05 | Headache       | mild
  12/03/2026 19:30 | Coffee         | 250 ml
  12/03/2026 23:10 | Sleep quality  | good
Every event needs a parameter (what you’re tracking) and a value (how it was).
Onboarding: Setup in 4 Steps
The very first time you launch the app, it guides you through the initial setup. You can skip onboarding at any time and fill things in later via Settings.
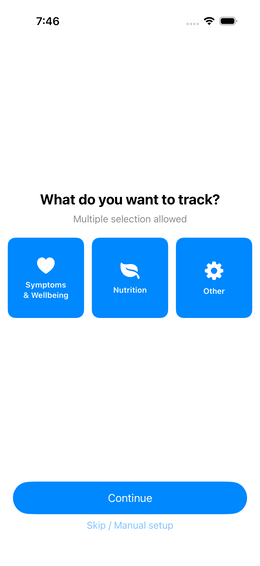
Step 1: Choose Your Focus
Select what you mainly want to track. This influences which suggestions and options appear in the next step. fig.↗
| Focus | Fits me if… |
|---|---|
| Symptoms & Health | I want to monitor complaints, medication or wellbeing |
| Nutrition | I want to understand what I eat |
| Other / Custom | I want to track something completely individual |
💡 You can choose multiple focus areas at once – the selection is not exclusive.
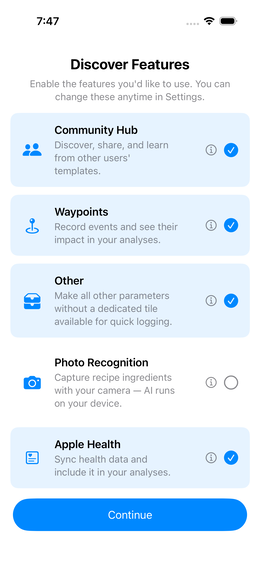
Step 2: Enable Features
Decide which optional areas you’d like to use. Anything you don’t enable here isn’t gone – you can add it later in Settings. fig.↗
| Feature | What it does |
|---|---|
| Community Hub | Share and download templates with others |
| Waypoints | Note life events and context markers |
| Photo Nutrition Analysis | Log meals via camera photo (Beta) |
| Apple Health | Sync data with the Health app |
| Other | All parameters and groups not assigned to the above categories – always available as a catch-all tile |
💡 If you selected “Symptoms & Health” as your focus, Apple Health is pre-selected automatically.
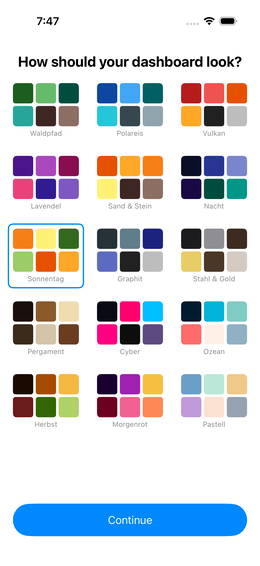
Step 3: Choose a Colour Palette
Choose the look of the app. You can change this at any time in Settings. fig.↗
Step 4: Done
The app sets everything up and you land on the dashboard. fig.↗
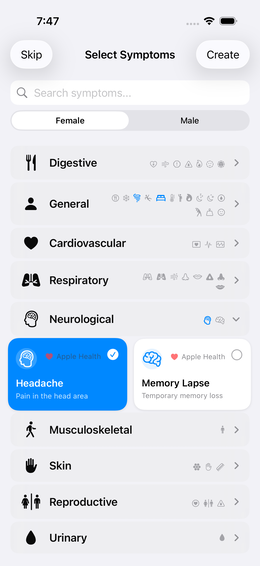
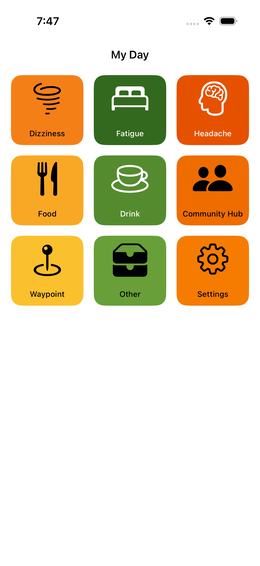
Recording Your First Event

After onboarding you see your dashboard. Depending on your chosen focus, parameters are already prepared. fig.↗
How to record an event:
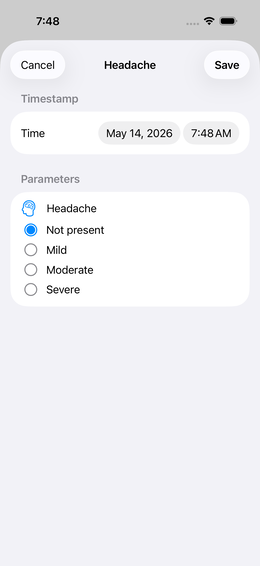
- Tap a parameter tile on the dashboard
- The input form opens fig.↗
- Enter the value (slider, tap, selection – depending on the parameter type)
- Tap “Save”

✅ That’s it. The event is saved. fig.↗ Later you can configure the tile to display the value or mini-reports directly.
Skip Onboarding
Not in the mood for the guided setup? Tap “Skip” – you’ll go straight to the empty dashboard.
Recommended quick-start steps afterwards:
- Tap Settings (bottom tab bar)
- Open the Template Library
- Download a suitable template – ready-made parameter sets for common use cases
→ More details: Template Library
Editing Events
Made a typo or set the wrong time?
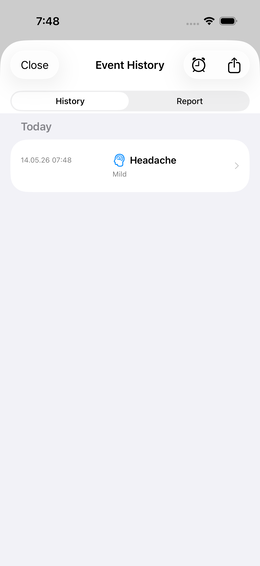
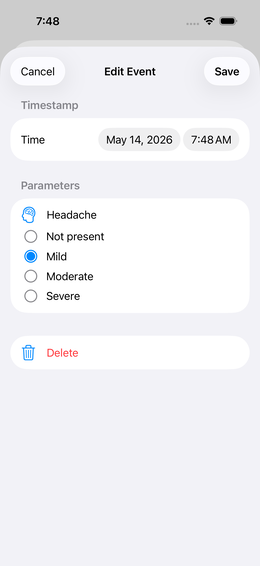
- Open the event history by long-pressing a tile on the dashboard fig.↗
- Tap the event fig.↗
- Change value, time or note → “Save”