Goal: A personal start page with your most important
parameters – for quick one-glance tracking.
Creating a Dashboard – Step
by Step
Note: If you came through the Quick Start flow you’ll already see the
Dashboard configuration menu for the “My Day” dashboard. Instead of the
(Plus) at the top left you’ll see the
in the first row of the preview
section.
1. Open Settings
Tap the Settings tile with the
gear icon on the Dashboard, or swipe left and
tap → Dashboards
Fig. 13 — Dashboard-Konfiguration
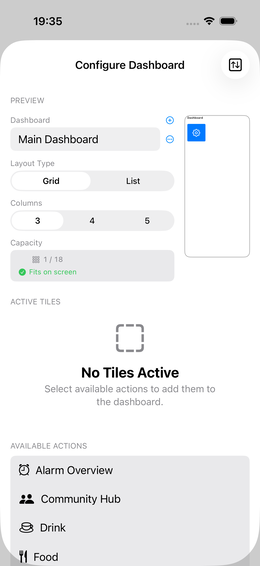
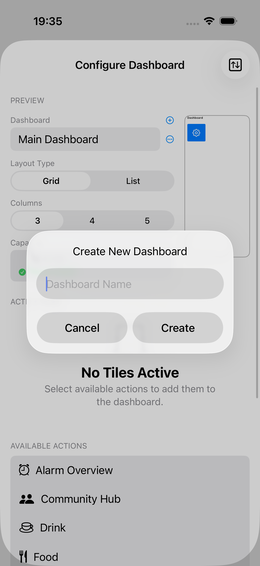
2. Create a New Dashboard
Tap (Plus) in the top right.
Fig. 14 — Neues Dashboard benennen
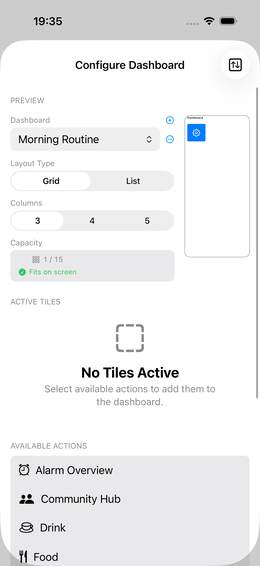
Fig. 15 — Leeres neues Dashboard
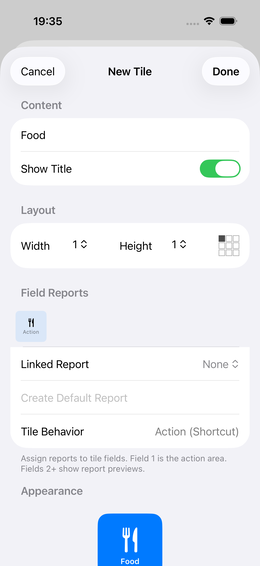
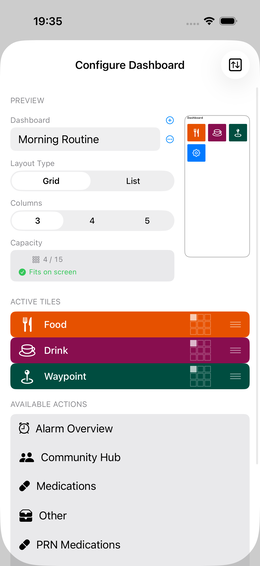
3. Select Actions
You see a list of “available actions” – these are
your configured parameters and groups.
Tap an entry to activate it (it moves to the active
list)
Swipe an active entry right to left to deactivate
it
💡 The list shows both individual parameters and
groups. Food, Drinks and
Waypoints are always available.
Fig. 16 — Kachel-Editor nach Auswahl
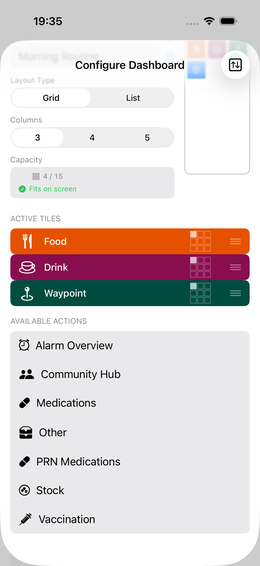
Fig. 17 — Drei aktive Kacheln
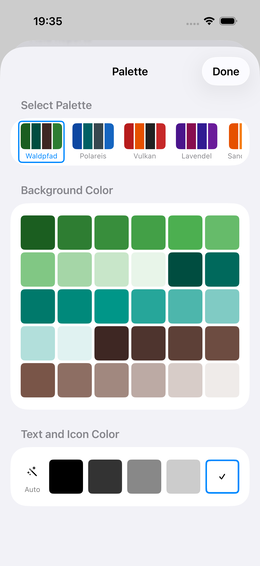
Fig. 18 — Palette-Auswahl für Kachelfarbe
4. Choose a Layout
Tap “Layout” to set the visual style:
Options:
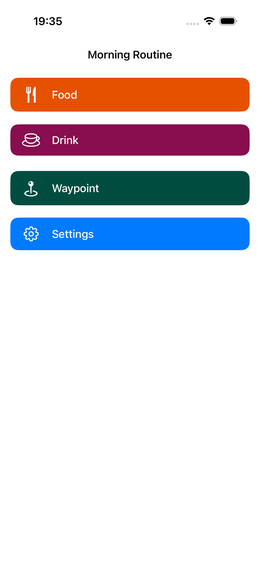
☰ List → compact list view, colorful
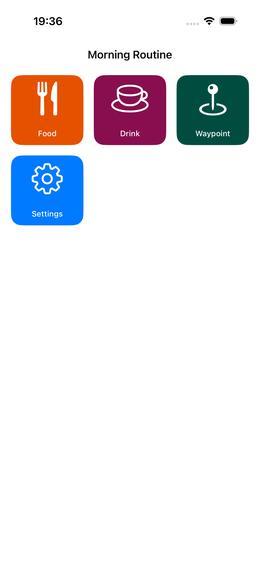
⊞ Tiles → 3, 4 or 5 tiles per row
With tiles you can enlarge individual tiles –
useful for frequently used parameters
The simulated mini-dashboard shows you a real-time
preview
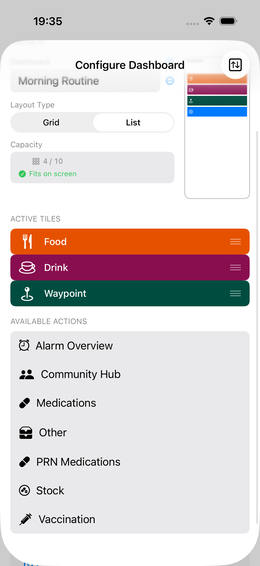
Fig. 19 — Layout-Picker: Liste
Fig. 20 — Layout-Picker: Raster
Fig. 21 — Live-Vorschau im Kachel-Editor
Fig. 22 — Fertiges Dashboard: Liste
Fig. 23 — Fertiges Dashboard: Raster
5. Finish
Tap “Done” – your dashboard becomes the app’s new
start page.
Optimizing Your Dashboard
Reorder tiles: Long-press the drag icon
(3 lines on the right) → drag up or down
Check capacity: The app shows how many tiles fit on
screen. An orange triangle means: this tile will be cut off →
reorder.
Multiple dashboards: You can create as many
dashboards as you like for different contexts (e.g. “Morning Routine”,
“Sport”, “Nutrition”).
If Something Doesn’t Look
Right
Lost in the app? Close the app and restart it – you
always land on your dashboard.
Empty dashboard? Check whether you’ve set up
parameters → Parameters
Checklist
🎉 Basic Setup Complete!
You now have everything you need to get started. Next steps depend on
your use case:
parameters and
groups.
Food, Drinks and
Waypoints are always available.